
Who doesn’t love a good chocolate bar? Whether you’re a die-hard dark chocolate fan, a lover of creamy milk chocolate, or someone who enjoys the rich complexity of white chocolate, there’s no denying that chocolate bars hold a special place in our hearts. They are the perfect treat for any occasion—whether you need a quick energy boost, a moment of indulgence, or a thoughtful homemade gift.
But what goes into making a chocolate bar from scratch? While store-bought options are readily available, nothing compares to the experience of crafting your very own chocolate bar at home. Not only can you control the quality of the ingredients, but you can also customize flavors, textures, and sweetness levels to suit your personal taste.
In this guide, we’ll walk you through everything you need to know about chocolate bars. From selecting the best ingredients to mastering the step-by-step process, you’ll learn how to create your own irresistible chocolate treats. So, grab your apron, and let’s dive into the delicious world of homemade chocolate bars!
Ingredients for Chocolate Bar
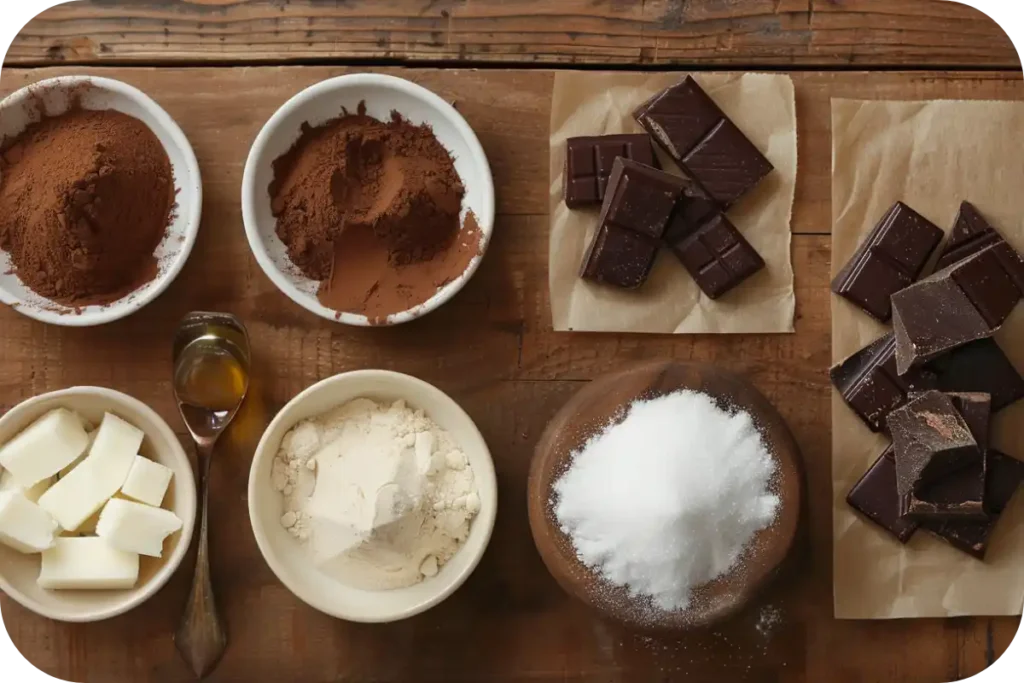
When it comes to making a high-quality chocolate bar, the ingredients matter. You don’t need a long list of complicated items—just a few simple, high-quality ingredients will do. Here’s what you’ll need:
Basic Ingredients:
- Cocoa Butter – This is the fat extracted from cocoa beans, which gives chocolate its smooth, melt-in-your-mouth texture.
- Cocoa Powder or Chocolate Liquor – Cocoa powder adds deep chocolate flavor, while chocolate liquor (pure ground cocoa beans) provides a richer, more intense taste.
- Sweetener – Choose from granulated sugar, powdered sugar, honey, maple syrup, or even a sugar substitute like stevia for a healthier option.
- Milk Powder (for Milk Chocolate) – If you’re making milk chocolate, milk powder adds creaminess. For a vegan version, use coconut milk powder.
- Vanilla Extract – A small amount enhances the overall flavor and adds warmth to your chocolate bar.
- Salt – Just a pinch balances the sweetness and intensifies the chocolatey goodness.
Optional Add-Ins:
- Nuts (almonds, hazelnuts, pecans, or cashews) for crunch and extra flavor.
- Dried Fruit (cranberries, raisins, cherries, or apricots) for a chewy texture and natural sweetness.
- Spices (cinnamon, chili powder, or nutmeg) for a hint of complexity.
- Extracts & Oils (peppermint, almond, or orange oil) to infuse unique flavors into your chocolate.
- Crispy Rice or Cookie Bits for a satisfying crunch.
Using high-quality ingredients is key. For the best results, opt for organic cocoa powder, natural sweeteners, and fresh nuts or fruits. The better your ingredients, the better your chocolate bar will taste!
Tools Needed for Preparing
Before we start crafting our homemade chocolate bars, let’s go over the essential tools you’ll need.
Essential Tools:
- Double Boiler (or a Heatproof Bowl Over a Pot of Simmering Water) – This is necessary for melting cocoa butter and mixing ingredients without burning them.
- Silicone Molds or a Lined Baking Dish – To shape your chocolate bars, use a silicone mold designed for chocolates or a lined baking dish if you prefer to cut them into pieces later.
- Spatula – A flexible silicone spatula helps mix and spread the chocolate evenly.
- Whisk – A small whisk is perfect for blending ingredients smoothly.
- Thermometer – Chocolate must be tempered to the correct temperature for the best texture and snap. A thermometer ensures precision.
- Parchment Paper – If using a baking dish, parchment paper prevents sticking.
Optional Tools:
- Food Processor or Blender – Useful for grinding nuts or blending ingredients smoothly.
- Sifter – Helps remove lumps from cocoa powder for a velvety texture.
- Offset Spatula – Ideal for smoothing out the chocolate in molds.
With the right ingredients and tools in hand, you’re now ready to start the exciting process of making your own chocolate bars. Stay tuned for the next part, where we’ll dive into the step-by-step process of preparing, cooking, and assembling your homemade chocolate bars!
Step-by-Step Guide
Now that we have our ingredients and tools ready, it’s time to dive into the process of making a homemade chocolate bar. This step-by-step guide will help you achieve a smooth, rich, and flavorful chocolate bar that rivals anything you can buy at the store.
Preparing
Before we begin melting and mixing, it’s essential to prep everything correctly. Proper preparation ensures that your chocolate turns out silky and well-tempered.
1. Measure and Sift the Ingredients
Start by measuring all your ingredients. If you’re using cocoa powder, sift it to remove any lumps. This helps create a smoother texture in the final product.
2. Chop Cocoa Butter (If Using a Solid Block)
If your cocoa butter comes in a large block, chop it into small, even pieces. This helps it melt evenly and prevents scorching.
3. Prepare Your Molds
If you’re using silicone molds, lightly grease them with a neutral oil or line them with parchment paper to prevent sticking. If you’re using a baking dish, line it with parchment paper so you can easily remove the chocolate once it sets.
Cooking
This is the most crucial part of the chocolate-making process. The key to a successful chocolate bar is melting the ingredients properly and tempering them to get that signature “snap” and glossy texture.
👉 Want to master the art of tempering chocolate? Learn step-by-step techniques on Masterful Munch to achieve the perfect glossy finish and crisp snap! 🍫🔥
1. Melt the Cocoa Butter
Using a double boiler, melt the cocoa butter over low heat. If you don’t have a double boiler, place a heatproof bowl over a pot of simmering water, ensuring the bottom of the bowl doesn’t touch the water. Stir occasionally until completely melted.
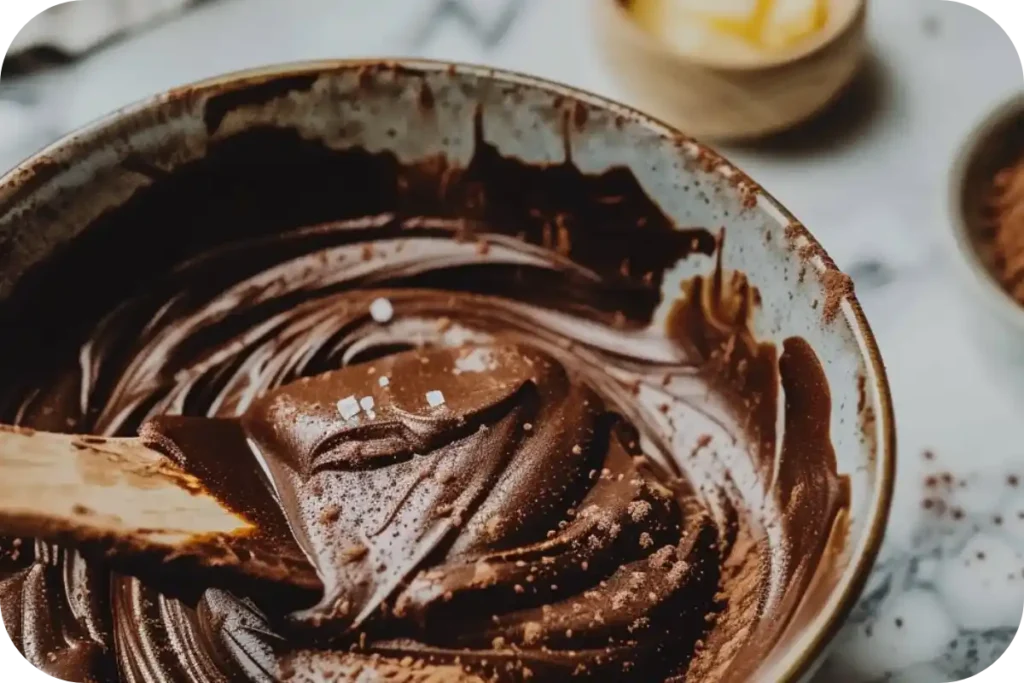
2. Add Cocoa Powder and Sweetener
Once the cocoa butter has melted, whisk in the cocoa powder and sweetener. Keep stirring to ensure there are no lumps. If using chocolate liquor instead of cocoa powder, let it melt fully before adding the sweetener.
3. Add Vanilla and a Pinch of Salt
Once everything is melted and mixed, stir in vanilla extract and a pinch of salt. These small additions enhance the chocolate’s natural flavors.
4. Tempering the Chocolate
Tempering is essential for achieving a smooth, shiny chocolate bar that doesn’t melt too quickly in your hands. This involves cooling the chocolate to a specific temperature before letting it set. Here’s how:
- Remove the bowl from heat and allow the chocolate mixture to cool to about 80°F (27°C).
- Stir continuously to prevent solidifying.
- Reheat the chocolate slightly until it reaches 88-91°F (31-32°C).
- Once at the right temperature, it’s ready to pour into molds.
“Tempering chocolate is the secret to getting that perfect crisp snap when you break a bar. Skipping this step might result in a dull or grainy texture.”
Assembling
Now comes the fun part—adding flavors and pouring your chocolate into molds!
1. Pour the Chocolate into Molds
Carefully pour the tempered chocolate into your prepared molds or baking dish. Use a spatula to smooth out the surface.
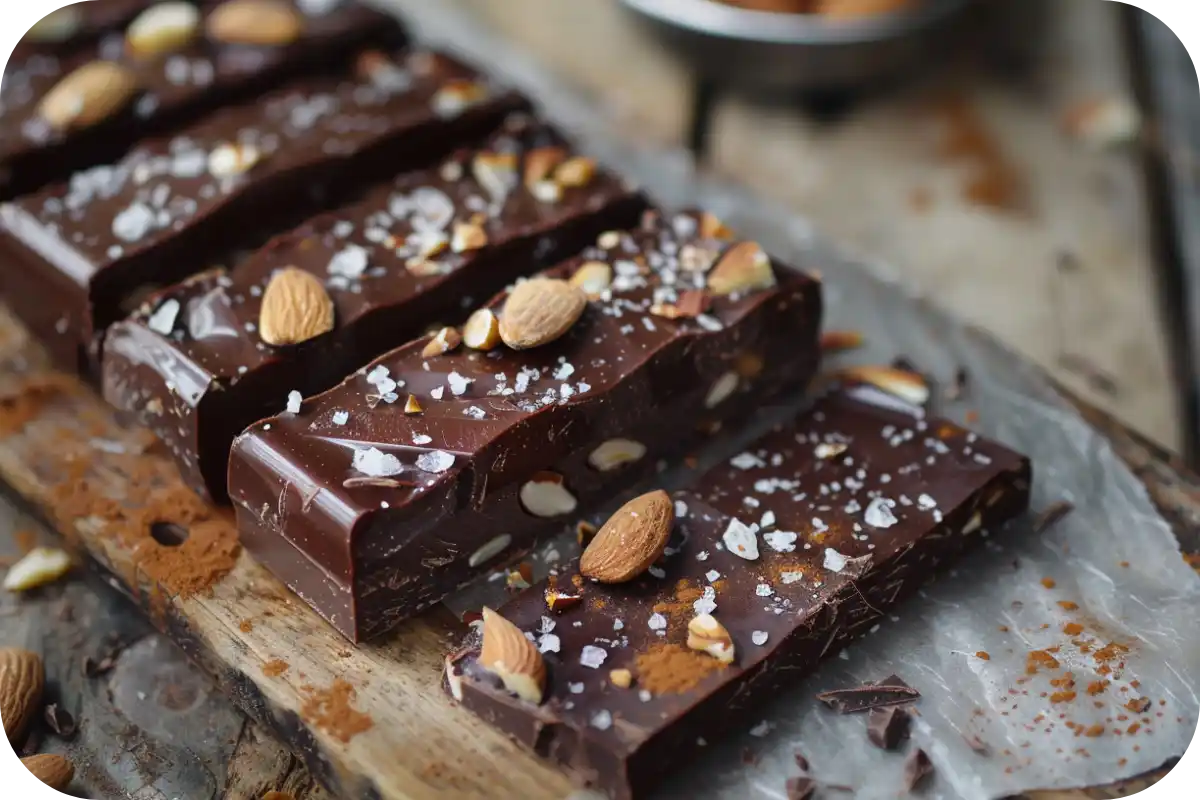
2. Add Toppings or Mix-ins
If you’re adding nuts, dried fruit, or other toppings, sprinkle them on top before the chocolate starts to set. Lightly press them into the surface so they adhere.
3. Let It Set
Allow the chocolate to cool at room temperature for about 10–15 minutes before transferring it to the refrigerator. Let it set for at least 1-2 hours or until fully hardened.
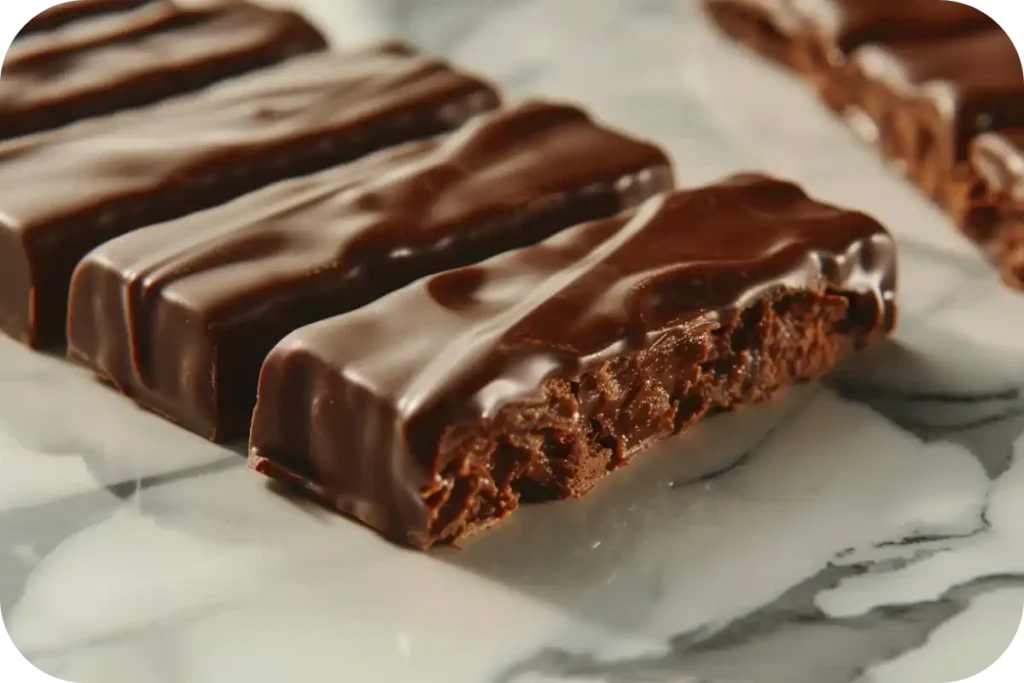
4. Unmold and Enjoy
Once the chocolate is fully set, gently pop it out of the mold. If using a baking dish, lift it out using the parchment paper and break it into pieces.
“Homemade chocolate bars not only taste better, but they also make for thoughtful gifts. Wrap them in parchment paper and tie them with twine for a rustic, handmade touch!”
Serving Suggestions
Now that you have a delicious homemade chocolate bar, how should you enjoy it? Here are some serving ideas to enhance the experience:
- On Its Own – Enjoy it as a simple, satisfying treat.
- With Coffee or Tea – Pair dark chocolate with a bold espresso or milk chocolate with a creamy latte.
- As a Dessert Topping – Chop your chocolate bar and sprinkle it over ice cream, yogurt, or pancakes.
- In Baking Recipes – Use homemade chocolate chunks in cookies, brownies, or muffins.
- With Wine – Dark chocolate pairs beautifully with red wines like Cabernet Sauvignon, while milk chocolate complements lighter, fruitier wines.
“Chocolate is a universal comfort food. Whether melted, chopped, or eaten straight from the bar, there’s no wrong way to enjoy it!”
Variations of Chocolate Bar
One of the best things about making homemade chocolate bars is the ability to customize them however you like. Whether you want to cater to dietary needs or experiment with flavors, the possibilities are endless.
Dietary Adjustments
If you have specific dietary preferences or restrictions, here are some easy swaps to make your chocolate bars more inclusive:
- Vegan Chocolate Bar – Replace milk powder with coconut milk powder or almond flour for a dairy-free alternative. Use maple syrup or agave nectar instead of honey.
- Keto-Friendly Chocolate Bar – Use a sugar substitute like erythritol or monk fruit instead of regular sugar.
- Nut-Free Chocolate Bar – If you have nut allergies, avoid nut-based toppings and instead use seeds like sunflower or pumpkin seeds.
- High-Protein Chocolate Bar – Add a scoop of protein powder to the mixture for an extra protein boost.
“No matter your dietary needs, homemade chocolate bars can be easily adapted to fit your lifestyle!”
Flavor Enhancements
Looking to level up your chocolate game? Try these exciting flavors:
- Salted Caramel – Drizzle homemade caramel sauce over the chocolate before it sets and sprinkle with sea salt.
- Spicy Dark Chocolate – Add a pinch of cayenne pepper or chili powder for a subtle heat.
- Peppermint Crunch – Mix in crushed peppermint candies or a few drops of peppermint extract.
- Espresso Infusion – Stir in finely ground espresso powder for a deep, coffee-infused chocolate bar.
- Coconut Delight – Add shredded coconut and a drizzle of coconut oil for a tropical twist.
“The beauty of homemade chocolate bars is that you can get as creative as you want. Mix and match flavors to find your perfect blend!”
Common Mistakes and How to Avoid Them for Chocolate Bar
Even the simplest recipes can go wrong if you’re not careful. Here are some common mistakes people make when making chocolate bars and how to avoid them.
- Skipping Tempering – If you don’t temper the chocolate properly, it may turn out dull or too soft. Always follow the correct heating and cooling process.
- Overheating the Chocolate – Chocolate burns easily! Use low heat and stir continuously to prevent scorching.
- Not Using the Right Mold – If your mold is too deep or uneven, the chocolate might not set properly. Always use a smooth silicone mold or a lined baking dish.
- Adding Too Much Liquid – Adding too much vanilla extract or liquid sweeteners can cause the chocolate to seize up. Stick to small amounts.
- Rushing the Cooling Process – Let the chocolate set naturally at room temperature for a while before refrigerating to avoid condensation.
“Patience is key in chocolate making. Take your time, and you’ll be rewarded with a perfectly smooth, glossy chocolate bar!”
Nutritional Benefits of Chocolate Bar
While chocolate bars are often seen as indulgent treats, they also come with several surprising health benefits—especially when made with high-quality ingredients.
Health Benefits
- Rich in Antioxidants – Dark chocolate contains powerful antioxidants that help fight oxidative stress.
- Heart Health – Studies show that dark chocolate may improve blood circulation and reduce heart disease risk.
- Boosts Mood – Chocolate naturally contains compounds like serotonin and theobromine, which help elevate mood and reduce stress.
- Good for Brain Function – Flavanols in chocolate have been linked to improved cognitive function and memory.
Calories and Macronutrients
The nutritional content of your chocolate bar depends on the ingredients you use. Here’s a rough breakdown per 1-ounce (28g) serving of dark chocolate:
- Calories: ~150–170 kcal
- Fat: ~10–12g
- Carbohydrates: ~12–14g
- Sugar: ~6–8g (varies based on sweetener used)
- Protein: ~2–3g
- Fiber: ~2–4g
For a healthier option, opt for dark chocolate with at least 70% cocoa content and minimal added sugars.
Pairing Suggestions for Chocolate Bar
Pairing chocolate with other foods and drinks can elevate the experience. Here are some great pairings to try:
- Cheese – Dark chocolate goes surprisingly well with aged cheddar or gouda.
- Nuts – Pair with almonds, hazelnuts, or pistachios for extra crunch.
- Fruits – Fresh berries, bananas, or oranges complement the richness of chocolate.
- Tea or Coffee – A hot cup of coffee or tea enhances chocolate’s depth of flavor.
- Wine or Spirits – Dark chocolate pairs well with bold red wines like Merlot or spirits like whiskey.
“Pairing chocolate with the right food or drink can take your tasting experience to a whole new level!”
Frequently Asked Questions
What is the most popular chocolate bar?
The most popular chocolate bar varies by country, but globally, Snickers is often ranked as the best-selling chocolate bar. It features a combination of nougat, caramel, and peanuts covered in milk chocolate, making it a favorite for those who enjoy a mix of textures and flavors. Other popular choices include Kit Kat, Reese’s Peanut Butter Cups, and Milky Way.
Is Sue the name of a chocolate bar?
No, “Sue” is not the name of a widely known chocolate bar. While there are many chocolate brands and bars with unique names, “Sue” does not appear to be associated with any mainstream or famous chocolate product.
What is the oldest chocolate bar still being made?
The Cadbury Dairy Milk chocolate bar, introduced in 1905, is one of the oldest chocolate bars still in production today. Another contender is the Fry’s Chocolate Cream, which was first created in 1866 by J.S. Fry & Sons and is recognized as one of the world’s earliest mass-produced chocolate bars.
What is the #1 chocolate bar in the US?
The Reese’s Peanut Butter Cups consistently ranks as the #1 best-selling chocolate candy in the United States. While it’s technically more of a chocolate cup than a bar, its immense popularity makes it the top choice among chocolate lovers. In terms of traditional chocolate bars, Snickers and Hershey’s Milk Chocolate Bar are also among the best-selling options.
Let me know if you need any modifications or additional FAQs! 🍫😊
Conclusion for Chocolate Bar
Final Thoughts
Making homemade chocolate bars is a rewarding experience that allows you to customize flavors, control ingredients, and enjoy a truly high-quality treat. Whether you’re making them for yourself or as a thoughtful gift, homemade chocolate bars are easy, fun, and delicious.
From selecting premium ingredients to mastering the art of tempering, this guide has covered everything you need to know to create the perfect chocolate bar. So why not give it a try? Gather your ingredients, follow the steps, and indulge in a homemade chocolate experience!
👉 Want to take your chocolate obsession even further? Try this decadent Chocolate Candy Bar Cake recipe on Allrecipes: Chocolate Candy Bar Cake 🍫🎂
Call to Action
Now that you know how to make chocolate bars from scratch, it’s time to experiment! Try different flavors, play around with toppings, and share your creations with friends and family.
Have you made homemade chocolate before? What’s your favorite flavor combination? Let us know in the comments below!
Homemade Chocolate Bar
Equipment
- Double Boiler
- Silicone Molds
- Spatula
- Whisk
- Thermometer
Ingredients
Chocolate Base
- 1/2 cup cocoa butter chopped into small pieces
- 1/2 cup cocoa powder sifted
- 1/4 cup sweetener maple syrup, honey, or sugar substitute
- 1 tsp vanilla extract
- 1/4 tsp salt optional
Optional Add-Ins
- 1/4 cup chopped nuts almonds, hazelnuts, or pecans
- 1/4 cup dried fruit cranberries, raisins, or cherries
- 1/2 tsp spices cinnamon, chili powder, or nutmeg
Instructions
- Melt cocoa butter in a double boiler over low heat.
- Whisk in cocoa powder and sweetener until smooth.
- Add vanilla extract and salt, stirring continuously.
- Tempering: Let the chocolate cool to 80°F (27°C), then reheat slightly to 88-91°F (31-32°C).
- Pour chocolate into molds, add optional mix-ins, and smooth the surface.
- Let the chocolate set at room temperature for 10-15 minutes, then refrigerate for 1-2 hours.
- Unmold and enjoy your homemade chocolate bars!